Keep your plants lush this summer with a DIY olla that will make watering much easier. Create an environmentally friendly self-watering system with our step-by-step guide!
A DIY olla is a zero-waste and zero-energy self-watering solution. It is an excellent option to help you keep your plants alive in summer, even if you’re gone for a couple of days. Water stored in an olla doesn’t evaporate as quickly as it does in above-ground watering systems because it is mostly surrounded by soil and protected from direct sunlight.
You can also save on other resources used by many store-bought watering systems, as it doesn’t have a pump and therefore requires no electricity. If, at some point, you decide to replace or take out the olla, you can easily take it apart and reuse the pot as an actual planter.
Equipment For Your Olla DIY
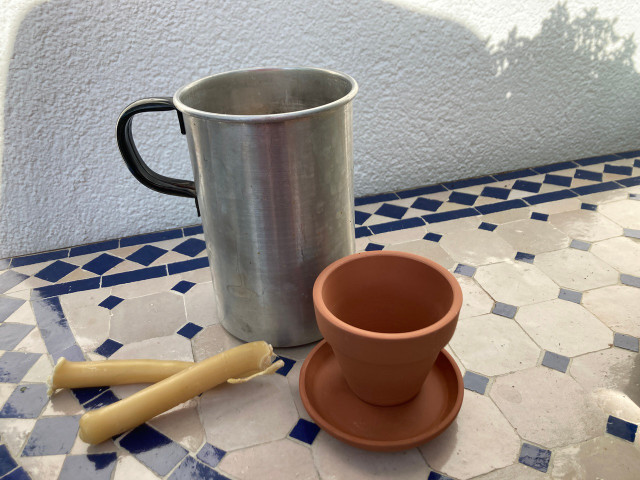
You only need a couple of things for this olla DIY. All of these items are reusable, so you may not have to buy any equipment at all:
- Large pot
- Small metal can or pot. You can also use a stainless steel melting bowl if you have one (if not, you can find them on Amazon**) or a special candle-making pot (also available on Amazon**)
- Spoon
- Unglazed terracotta planter with a drainage hole. The size depends on how big the planter or flowerbed is that you want to place it in and how much water you want it to hold. Your olla shouldn’t take away too much space from the roots of the plant and you also need to make sure there’s enough space for the soil.
- A matching saucer. It should be just a bit wider than the top part of your planter (make sure that the planter fits inside the saucer when turned upside down)
- Beeswax: if you have some leftover wax from beeswax candles you can use that, if not, you can buy beeswax drops that can be melted instead. Note: if you’re using leftover candle wax, make sure it is pure beeswax and that there are no ingredients in it that you wouldn’t want in your soil.
How to Make a DIY Olla: Step One
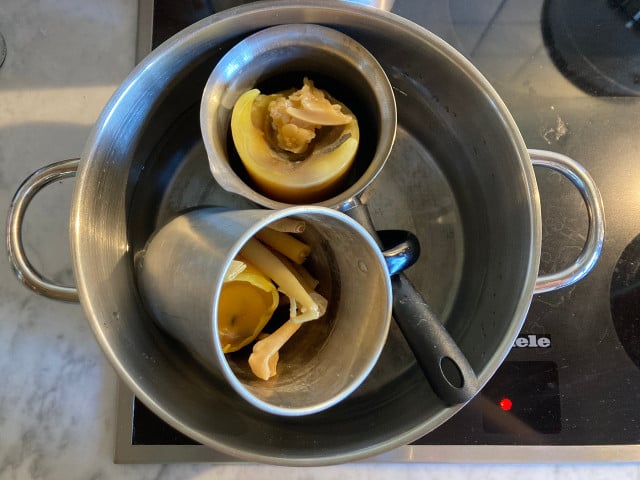


Melting the wax
Safety first! If wax gets too hot, it can inflame itself and pose a dangerous fire hazard! Make sure to follow these steps to stay safe:
- Never melt wax directly in a pot on the stove, in the microwave or in the oven!
- Instead, always use a water bath, which won’t get as hot as the original heat source and allows you to melt the wax down slowly and evenly.
- Never leave melting wax unattended but watch it at all times.
- For additional safety in case of a flame, turn off the exhaust fan which could create a bigger fire.
Getting started:
- Fill the large pot halfway with water. How much water you use also depends on the sizes of your two pots — use enough so that half of your smaller pot is covered with water, once you place it in the larger pot.
- Place your beeswax inside the smaller pot or melting bowl, then place this pot inside the water.
- When starting the water bath, set the stove to a low-medium temperature. The water should be warm enough for the wax to melt (let it simmer) but not so hot that it will boil. Under no circumstances should you let the wax itself boil.
Step Two: Attaching the Planter to the Saucer
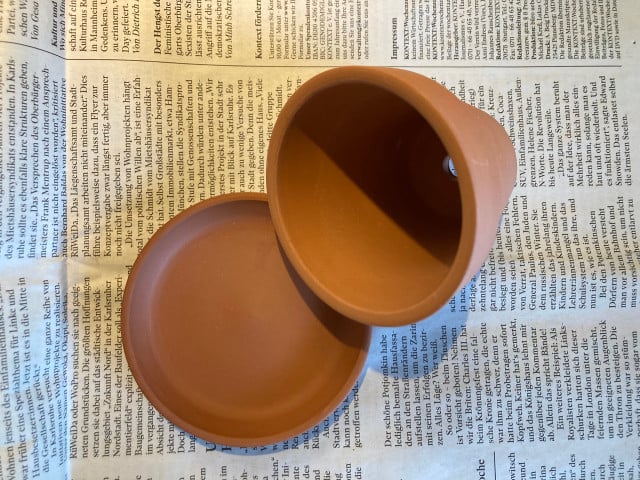


This part could get a little messy, so prepare a clean surface and cover anything you don’t want to drip wax on.
- Once the beeswax has melted completely, drip it on the rim of the terracotta planter.
- You can use a spoon or pour it directly from the water bath. You need to do this rather quickly because the melted wax won’t stay liquid for too long.
- Next, place the pot upside down inside the saucer, gluing the two parts together. Let it dry until the beeswax is hard.
Note: Whichever method you choose, try not to spill too much wax on the other parts of the planter – remember you’ll want the water to go through the porous terracotta, so a wax layer inside the pot would be counterproductive.
Step 3: Planting and Watering Your Olla DIY
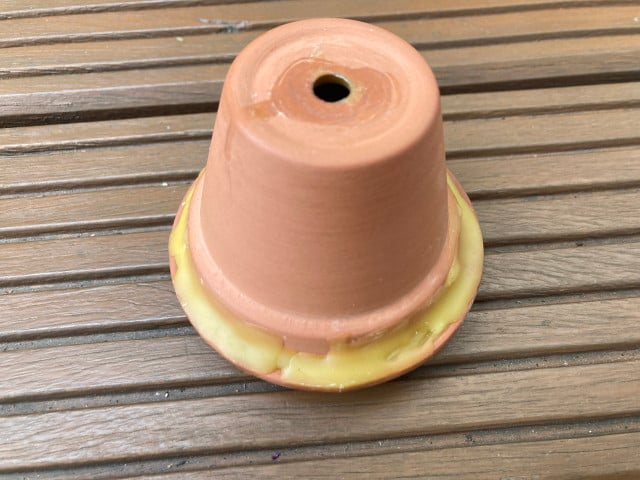


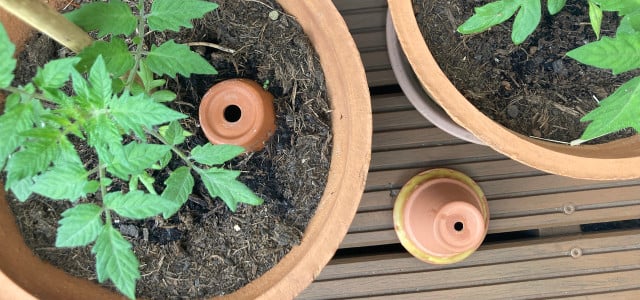
Once the beeswax has dried, pour some water into your olla through the drainage hole to see if there is any water coming from the parts that are glued together. If there is, you may want to add an extra layer of beeswax. The pot should hold the water and only slowly release moisture through the clay walls. Now that your olla is ready to be planted, dig a small hole in the soil next to your plant. Be careful with the plant’s roots. Bury the olla only so deep that the top sticks out of the soil. Et voilà – all done!
The olla evenly releases moisture when the soil around it gets too dry. All you need to do is add some fresh water now and then. You can leave it in the pot all summer, just remember to take it out before the first frost so it won’t shatter.
If you wanted to make an even bigger olla, you could use two clay planters instead of a planter and a saucer. The process is the same, except you need to glue shut one of the drainage holes (you can cover it with a stone, for example) and then glue together the two planters at the top.
Another very simple version of an olla goes like this: take the small clay pot and glue the drainage hole shut. Place the pot right-side up in the soil. Pour water into the pot, then place a saucer on top as a removable cover. Remove the saucer whenever you want to add more water.
Other Self-Watering Options
Let’s take a look at two other self-watering systems.
Perhaps you’ve seen this one before: Grab a large plastic bottle and poke a few holes in the cap. Tape a small stake or stick to the side of the bottle so that it reaches several inches above the top of the bottle. Fill the bottle with water, screw on the cap and push the stake into the soil so that the bottle hangs right above it. The water should now slowly and evenly drip from the bottle into the soil. This is a simple, if somewhat less sustainable, alternative to the system described above.
Another simple solution that you can use for smaller houseplants or herbs, for example, requires a large pot or bucket to hold water, a few pieces of cotton string and paper clips or screws to use as weights. Here’s how it works: gather your houseplants in one place, cut a piece of string for each, then attach one paperclip to the end of each string. Fill the pot with water and place it slightly higher than the other plants (you can put it on top of a box or a side table).
Place the paper clips with the string attached inside the water and bury the other end of the string in the soil of each plant. The plants will wick water through the strings as long as they are hanging in a straight line from the pot above and not hanging down below.
This is also known as a wick system that is often used in hydroponics — a method of growing plants without soil. You can read more about how to build a hydroponic system here: What Is Hydroponics and How Does It Function?
Read more:
- How to Start a Garden Step-by-Step: A Guide for Green Thumbs in Training
- How to Make A Homemade Ant Trap: Step-by-Step DIY
- 13 Different Types of Wasps to Watch Out For This Summer
Do you like this post?


