The taro plant is a versatile veggie whose roots and leaves can be found in everything from tea to curry. Here’s how you can grow, harvest and cook taro leaves and roots at home.
Taro, or Colocasia esculenta, is a tropical to subtropical plant native to Southeast Asia and parts of Africa. The edible species has delicious leaves and roots, commonly cooked in African, Oceanic and South Asian dishes. Growing and harvesting this nutritious vegetable at home is easy. You can keep it outside if you live in a tropical — or relatively warm — climate. Make sure to plant the taro in the spring. Otherwise, grow your taro indoors, any time of the year. Here’s how to grow this popular plant so you can harvest your own taro leaves and roots.
Materials:
- Taro Root
- Large, deep pot with drainage holes
- Rich, well-draining potting mix
- Compost mix
- Spray bottle (optional)
- Spade/garden fork (optional)
Instructions:
- Fill your pot with soil to at least four inches from the top.
- Plant the taro root and cover it with three inches of soil. You can plant one root per pot or use a larger flower bed. Keep the roots around 20 inches apart.
- Place the pot in a sun-lit spot. Part shade is okay, but the taro should get several hours of bright sun per day.
- Water regularly to keep the soil moist. Once it starts producing shoots, you can also mist those with a spray bottle.
- Once a week, feed the taro some compost mix.
- Over time, the taro will grow a thick bush up to six feet tall. You can harvest some mature, opened taro leaves without harming the plant. — just make sure not to pick all of them. It will continue to grow fresh shoots over the following months.
- The actual taro root (tuber) can be harvested within six months of planting. Using a spade/garden fork or your hands, gently dig the tuber out of the soil. If you planted the taro outside, harvest it in early fall, before the first frost.
How To Cook Taro Leaves


(Foto: CC0 / Pixabay / hoaihungtv)
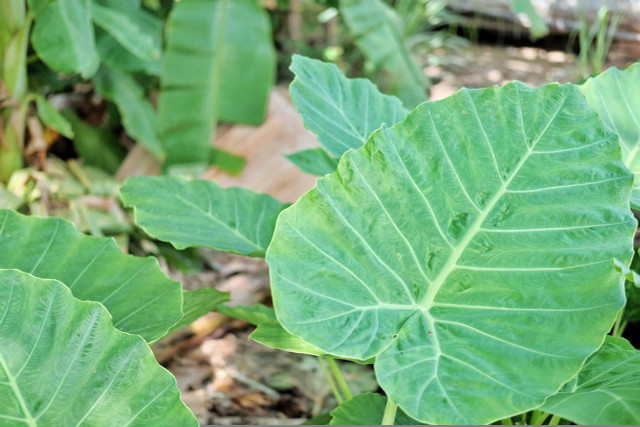
Taro leaves can be cooked and enjoyed similarly to other leafy greens. The shoots are blanched and boiled, then added to curries, chutney, stir-fries and stews. Taro leaves are typically found in Filipino, Chinese, Nigerian, Ghanaian and Caribbean dishes. The leaves are often paired with rich flavors like coconut milk, lemongrass stalk and masala.
Make sure to wash taro leaves with salty water before you cut them up for cooking. Otherwise, the leaves can cause irritation and itchiness. Compared to spinach and kale, taro leaves must be cooked longer to release toxins. It’s also best to cook them twice. Boil them for 10 to 15 minutes, then drain and repeat the process with fresh water. After the second boiling, the leaves can be thrown in with the rest of your ingredients.
Aside from cooking, taro leaves are commonly used as a zero-waste packaging material for food. Similar to banana leaves, taro leaves are strong, large and thick, making them great for wrapping up food to store in the fridge or a to-go bag.
Taro Root Tips


(Foto: CC0 / Pixabay / pisauikan)
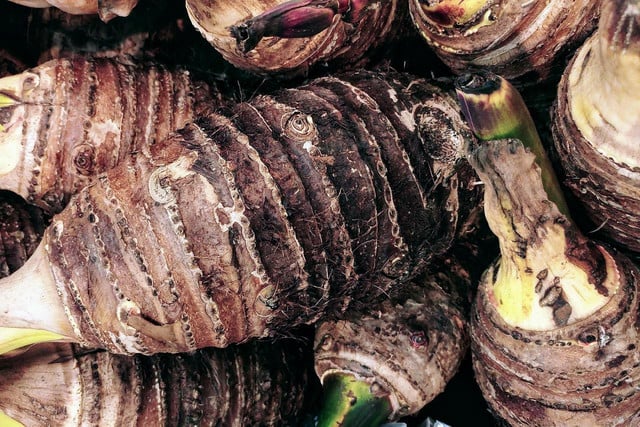
A starchy vegetable, taro root has a similar consistency to a sweet potato. It is valued for its thickening properties and sweet, nutty flavor. It can be used in food, drinks, and more. Make sure, however, not to harvest the root until you are ready to eat it. Taro root is highly perishable and can only be stored in a cool, dark place for a couple of days. It’s best to get started peeling and chopping right away. You can use it in the following ways:
- Cooking: Taro root can be steamed, boiled, fried and baked. It tastes great in soups, stews and mashed sweet potatoes. You can even make taro root fries and chips using just a bit of salt and oil.
- Baking: This root veg makes a fun addition to baked goods because of its purple color and nutty flavor. Add it to pancakes, sweet breads, cakes, muffins and Chinese steamed buns.
- Drinks: Steamed taro root can be blended into smoothies or used to make taro milk tea.
- Frozen taro paste: If you find yourself with too much taro root to eat right away, you can use the rest to make frozen taro paste, which can be added to meals later. Steam small cubes of the root for fifteen minutes, then mash them with a fork. This gives you poi, a traditional Polynesian food. Separate the poi into an ice cube container and put it in the freezer. You can use the frozen poi cubes for smoothies, milk tea, and baked foods in the future.
Read more:
- Growing Vegetables from Scraps: How to Regrow Vegetables
- Mashed Potato With Skins: Zero Food Waste Recipe
- Creamy & Delicious Vegan Cassava Cake Recipe
- Lotus Root: Benefits & Culinary Use
Do you like this post?


