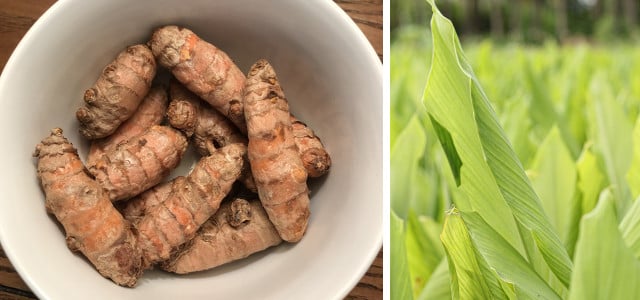
What could be cooler than growing a superfood in your own home? Today, we will share all of our tips and tricks so that you can grow turmeric in your own garden or even indoors.
Turmeric, or Curcuma Longa, is a tropical plant related to ginger. Its roots contain a substance called curcumin, which has anti-inflammatory and antioxidant qualities. In fact, many peer-reviewed studies (like this 2017 study), highlight the health benefits that turmeric can offer: it not only boosts your immune system but may help combat certain diseases such as:
- Metabolic Syndromes
- Alzheimer’s Disease
- Arthritis
- Cardiovascular diseases
- Cancer
This makes the turmeric spice itself one of the most powerful nutrients on the planet. Whilst many people enjoy adding powdered turmeric to lattes, teas, or smoothies, the most flavorful and effective form of this spice is the fresh root which you can conjure up from your home soil.
Not only will you save money in the long run by growing your own turmeric, but you will also produce a potent and powerful supplement with your very own fingertips. So without further ado, here’s how to properly prepare and grow turmeric.
Preparation
The most fundamental requirement for growing turmeric is that you must live in a warm enough environment. Although it’s a versatile plant that can grow even in monsoon weather, a warm temperature and humid conditions are vital to successful growth.
If you live in a warm environment (like USDA Plant Hardiness Zones 8 and higher) or have a heated conservatory, the good news is that growing Turmeric couldn’t be easier! However, you do need patience and to give it time to develop, but as you’ll see it’s well worth the wait.
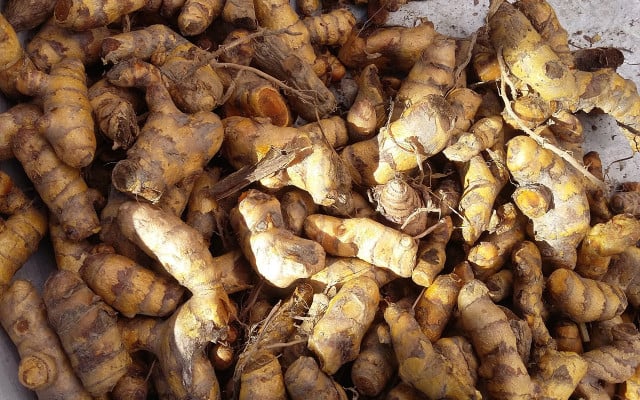
Although slightly more tropical, turmeric belongs to the same family as the beloved ginger spice. Both plants contain rhizomes, which are fleshy root-like structures. To grow a bountiful yield of turmeric all you need to do is get your hands on one little piece of the root and stick it in the soil.
Fortunately, you can sometimes find these root buds in local supermarkets, health food stores, or farmers’ markets in your area. You can even purchase them online, although we recommend using only US-based retailers to avoid any issues with customs as well as long transportation routes. We also recommend purchasing several root sections, just to increase your chances of success.
The final requirement for your preparation is that you need an area or container with rich, high-quality soil that drains well. This is a factor that shouldn’t be compromised on as turmeric is a hungry plant that needs to regularly feed off the right nutrients and moisture in order to thrive.
If your soil doesn’t drain well, roots may rot, meaning all of your efforts will be in vain. To help banish disappointment, we’d like to share with you some simple step-by-step instructions to help you enjoy your homegrown turmeric.
How to Grow Turmeric: Step-by-Step Instructions
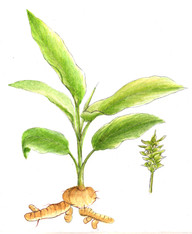


- Plan when to Plant: Remarkably, turmeric can take between seven and ten months from the initial planting until it’s ready to harvest. Therefore, we advise calculating ten months in advance from late winter to early spring to know just when you can expect your turmeric to be harvested. If you’re growing indoors or somewhere with a longer growing season, your timing can be much more flexible.
- Plant your Rhizomes: Cut your rhizomes into sections of two or three buds. Plants these rhizomes at least 4 inches below the soil with the roots facing downwards and space them at least 3-4 feet apart. It’s often recommended to leave the root section a little exposed at the top of the soil if possible, to reduce the likelihood of it rotting.
- Water as Needed: Keeping the soil damp yet not drowning the turmeric is critical, as overwatering invites the risk of fungal infections. Water the soil every two days or so, keeping it evenly moistened. Soon, some green leaves will start to appear and keep growing.
- Maintain Temperature and Humidity: You must keep your budding turmeric in the warmest places you can find with a temperature somewhere between 86-95°F being ideal. Leaving your plants sitting at lower temperatures with constantly damp soil will cause your rhizomes to rot rather than grow.
- Harvest: Once the turmeric plant reaches full size, it will stop growing above the ground whilst the rhizomes will continue to grow under the soil. In winter the green leaves of the plant will die but the plant will lay dormant yet healthy underneath the soil. Some growers recommend covering the soil with some mulch during winter months if you live in a cooler climate. After around 10 months, your turmeric roots will be ripe for the picking and you can spice up your recipes!
Turmeric Plant Care Tips
We can understand that growing anything for the first time can be daunting, which is why we’d like to share with you some plant care tips that will help encourage your turmeric to grow a little quicker, regardless of whether you’re growing it out in the yard or indoors.
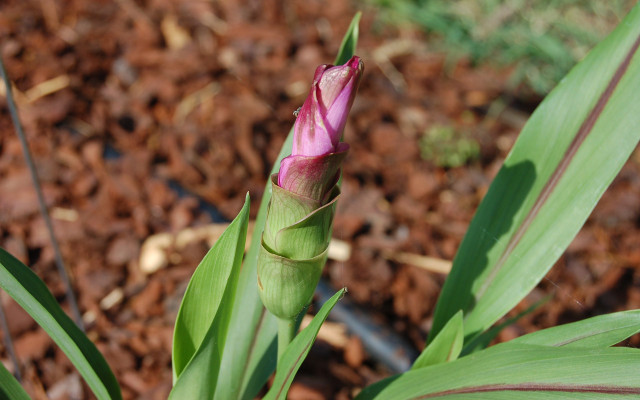


- Place Near Sunlight: While you may not reap the benefits of your planting for 10 long months, placing your turmeric sprouts in a place where they will be greeted daily by the sun from day one will undoubtedly pay off. If indoors, try a windowsill that will receive optimal levels of sunlight.
- Keep in a Warm Spot: To reiterate, sunlight and heat are key to success when growing turmeric. Turmeric is a plant native to Southern Asia therefore it should be placed in a garden spot that receives the most sunlight throughout the day, or failing that the warmest spot in your house. An (energy-efficient) heat lamp, or sitting your pot on a warm mat isn’t a bad spot either.
- Keep an Eye to the Sky: Keep an eye on the weather forecast when watering your plants and adjust the amount of water you use during dry spells or downpours accordingly.
- Avoid Greedy ‘Neighbors`: As we said, Turmeric is a very hungry plant with a huge appetite, therefore it’s best to avoid planting it beside members of the nightshade family such as eggplants, peppers, or tomatoes as they are ravenous feeders that also yearn for nitrogen, meaning that these plants may compete for nutrients. Turmeric’s distant cousin, ginger, or even legumes, such as beans or peas, are much better companions, as they don’t compete for nitrogen.
Harvesting Tips
Let’s imagine it’s seven to 10 months later, you’ve planted and cared for your turmeric roots and you see your leaves and stems turning brown, drying out, and withering. What do you do? Don’t despair, as this is actually a telltale sign that your fresh, homegrown turmeric is ready to be harvested.


All you need do in this final harvesting stage is take the turmeric out of its pot or plot in your garden, shake loose the potting soil, and shake or wash off all of the soil clinging to your fresh turmeric roots. Next, cut the stems off an inch or so above the rhizomes and wash them well. Bear in mind that the vibrant colors of the turmeric roots can also stain your hands yellow, so be sure to wear gloves when harvesting.
Tada! You’ve just grown your very own turmeric.
Your new turmeric rhizomes can stay fresh for up to six months if refrigerated in an airtight container. You can also freeze them if you wish to save them for longer.
Tip: If you want to keep growing turmeric, set some of the largest rhizome yields aside for next year’s planting process.
How to make Turmeric Powder
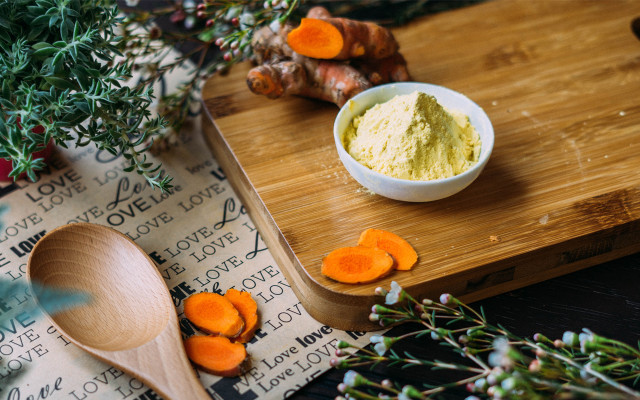


If you want to make turmeric powder, simply boil the rhizomes in a pot for an hour. Then cut them into thin slices. Let them dry completely in the sun or any warm and dry place until they’re brittle. Depending on your local climate this may take a few days. Grind the dried turmeric slices in a coffee grinder or mortar and pestle if you prefer, and you’ve got turmeric powder that you can use to spice up hot drinks or dinners. Turmeric powder may even help you get rid of bedbugs!
Important Information regarding Health-related Topics.
** Links to retailers marked with ** or underlined orange are partially partner links: If you buy here, you actively support Utopia.org, because we will receive a small part of the sales proceeds. More info.Do you like this post?


