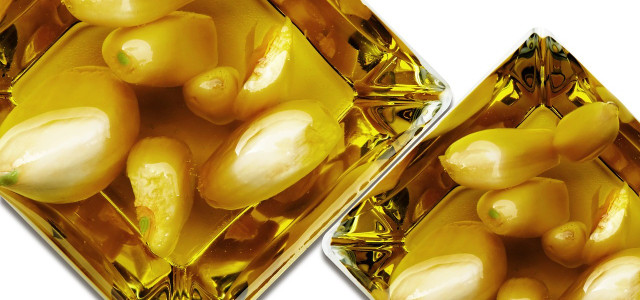
Fermenting garlic is the ideal way to make your cooking healthier and tastier. We’ll show you how to make fermented garlic from three ingredients!
Fermenting garlic yourself is not as difficult as you might think. All you need is a good-quality preserving jar and some fresh garlic – as well as plenty of patience! This is because fermented garlic will only develop its full flavor after fermenting for about a month. The fermentation process not only makes your garlic last longer: The resulting healthy probiotics also boost your immune system and are especially important for your intestinal flora.
You can serve fermented garlic as a side dish with a range of cuisines, or use it as a component of sauces and marinades. If you don’t have fresh garlic to hand, fermented garlic is ideal for preparing all kinds of delicacies:
- finely chopped in Asian noodle & rice dishes
- as tapas or a side dish for barbecue
- added to salads or salad dressing
- for sauces and marinades for fish, meat, and tofu
- as an ingredient for kimchi (it can even speed up the fermentation process due to its own pre-existing bacteria)
If the thing you love most about garlic is its pungent, slightly spicy flavor, be aware that it loses some of its edge during fermentation. On the other hand, if the smell of garlic on your breath or your hands tends to bother you, simply get rid of garlic breath with a few easy remedies.
Getting Prepared


To ferment garlic, you’ll need a preserving jar with a rubber seal and a sturdy swing top. (If you don’t have any: These great jars made from all-natural materials are available on Amazon**). Clean your jar thoroughly and sterilize it with boiling water before starting the recipe.
Important: Before preparing the fermented garlic, make sure you have bought enough garlic. The quantity of fermented garlic you end up with can vary greatly depending on the size of the garlic bulb – and of course the capacity of the jar. You should aim to have roughly enough cloves of garlic to tightly fill your fermenting jar to the brim.
You’ll need the following ingredients for fermenting garlic:
- Cloves of garlic (as many as will fit in your fermenting jar)
- Water (enough to cover your garlic)
- Salt (approx. 1 teaspoon per pint of water)
Fermenting Garlic: The Recipe
- Peel the garlic cloves without cutting off their bottom end.
- Fill the cloves so tightly into your preserving jar that there is little space between them and they reach just below the edge of the jar.
- Make a brine by dissolving salt in water. Use half a teaspoon of salt for every half pint of water. Salt dissolves better in warm water, but it should be cool when you add it to the garlic.
- Pour the saltwater over the garlic cloves until they are completely covered.
- Put the lid on the jar and close it (but without the rubber ring). Leave the jar at least at room temperature. Avoid direct sunlight.
- Open the jar just a crack once a day to equalize the pressure caused by the fermentation. (You can expect a strong garlic smell to fill your kitchen during this process!)
- Fermenting garlic takes a long time. You will have to wait for up to a week for the fermentation to start properly. You can tell it’s happening as soon as you see little bubbles in the brine.
- Then let the garlic ferment for at least a month to get the best results. The warmer the outside temperature, the faster the cloves will ferment.
- When you think your fermented garlic is ready, close the lid firmly with the rubber seal and put the garlic in the refrigerator.
- Note: Don’t let any bluish-turquoise discolorations put you off. This is a natural effect of the chemical fermentation process.
This article was translated from German by Will Tayler. You can read the original here: Knoblauch fermentieren: Die besondere Art, ihn haltbar zu machen
Important Information regarding Health-related Topics.
** Links to retailers marked with ** or underlined orange are partially partner links: If you buy here, you actively support Utopia.org, because we will receive a small part of the sales proceeds. More info.Do you like this post?


