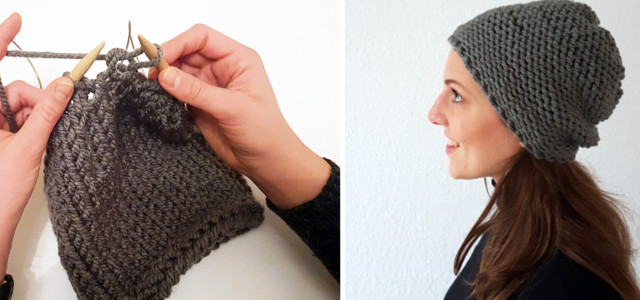
Knitting beginner? Not to worry, our guide on how to knit a beanie is achievable even for those with no (or very little) knitting experience. Our step-by-step instructions will have you knitting your own “inside-out” beanie hat in no time.
How to Knit a Beanie for Beginners
Knitting a simple beanie isn’t as hard as it seems. Even if this is your very first time trying your hand at this craft, this project is for you — we’ll show you how to knit a beanie that’ll keep your head nice and warm and look great in no time.
Instead of using classic knitting needles, you will use a circular needle, which is much easier to handle. In just a few hours (tops), you will have a finished beanie that goes with everything you have in your closet, and you can even wear it inside out!
Knitting your own clothes is fun and trains your fine motor skills. Here, you’ll learn how to knit a simple and basic beanie hat – but you can customize your beanie however you want. Choose the form, color, and size as you please.
Remember to keep sustainability in mind when choosing your material: If possible, go for organic, locally sourced wool — or you could try using vegan yarn made from organic materials like cotton, bamboo, or Tencel. Find out more below our how-to guide.
Tip: DIY knitted beanies make great last-minute eco-friendly gifts!
How to Knit Your Own Hat: Materials
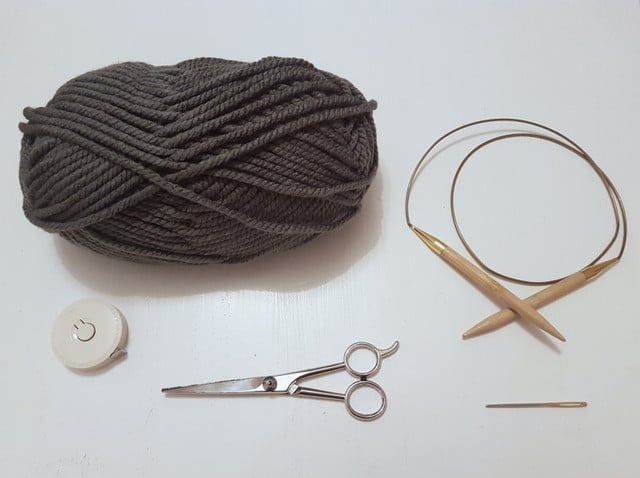
To knit an adult-sized beanie, you will need the following materials:
- 100 g (organic) wool, gauge 6-15
- Circular needle, gauge 6-15 (gauge of the needle should match the gauge of the yarn)
- Measuring tape
- Scissors
- Darning needle
Tip: The thicker the wool and the circular needle are, the faster you will be able to finish knitting your beanie. Because it is a bit easier to handle, thick wool is ideal for beginners. Plus, it will give your beanie a soft and full look.
Read on: DIY Face Mask: Sewing Instructions for Cloth Face Masks – and How They Protect Against Coronavirus
How to Knit a Beanie — Step by Step
Before you start: If this is your very first knitting project, the first thing that you need to know before learning how to knit a beanie is the difference between the “knit stitch” and the “purl stitch”. Watch this video to learn how to perform each one:
Step 1: Gauge your yarn
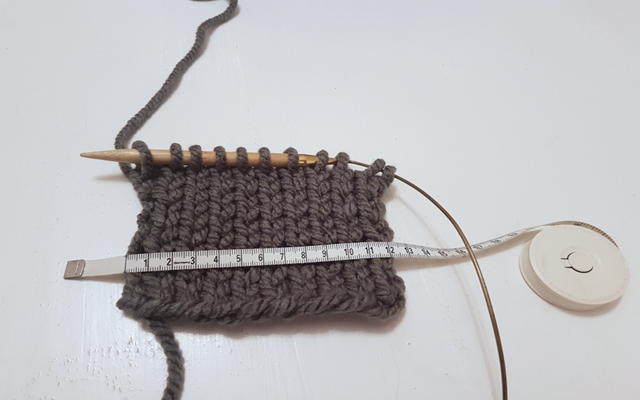


Before you can start working on your beanie, you must make a tension sample. This will allow you to easily measure how many stitches you will need to knit in order for the beanie to fit the circumference of your head — or that of the person you’re knitting the beanie for.
- Cast on ten stitches and then knit ten rows to form a small square. Allow your stitches to be somewhat relaxed, by not pulling too hard on the yarn. This video will help you make your tension gauge:
- Lay your tension gauge on a flat surface and measure its width, being careful not to stretch it.
- Your goal here is to measure how many stitches are in one centimeter. To do that, divide the number of stitches by the length of the swatch.
- In our example, the swatch measures 14 centimeters long. Divide ten stitches by 14 centimeters and you get 0.71 stitches per centimeter: 10 ÷ 14 = 0.71
- Measure the circumference of your head or the head of whoever you plan to give the beanie to, or use a standard size to orient yourself. Subtract ten centimeters from whatever number you get, so that the hat sits snugly on your head when it’s finished. In our case, we are using a head size of 58 centimeters: 58cm – 10cm= 48cm
- Calculate how many stitches you need in order to end up with a 48 centimeter circumference. To do this, simply multiply the circumference by the number of stitches that fit in one centimeter. In our case the math looks like this: 48 x 0.71= 34. That means we need exactly 34 stitches to reach 48 centimeters.
- Now you know how many stitches you need in order for the beanie to be the proper size when it’s finished. In the following step you’ll actually start learning how to knit the beanie.
Step 2: Cast On Stitches
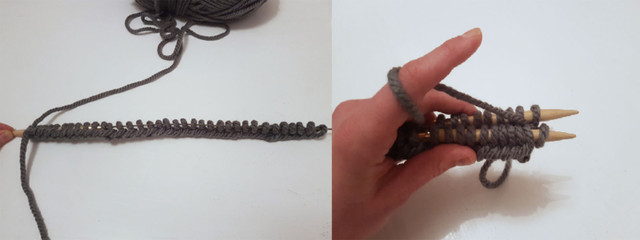


Now, all the measuring done, you’ll really start to learn how to knit a hat. In the second step, begin the stitching for the beanie.
Cast on the calculated number of stitches, as well as one extra stitch for the circular knitting.
Watch this video to learn how to cast on stitches:
Divide your cast on stitches into two parts and thread them onto the needles. Hold the two needles next to one another. The swatch on the rear needle should have one more stitch than the swatch on the front needle. Guide the yarn up through the middle between the two needles and hold it with your finger.
Step 3: Knitting in the Round
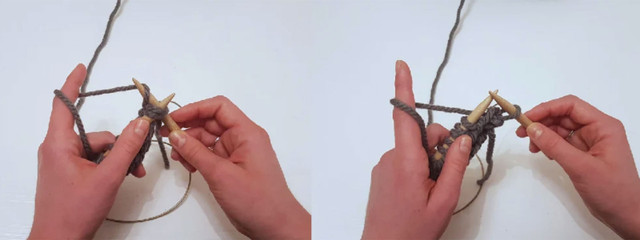


Now you can begin circular knitting.
- Transfer the swatch with the extra stitch on the rear needle to the front needle.
- Lay the working yarn over the front needle, in order to create purl stitches.
- To connect the beginning and the end of the swatch, pull the rear needle out at the front and pierce it between the first two stitches of the front needle.
This video will show you how to knit in the round:
Step 4: Knit the Rim of the Hat
The rim of the beanie is formed by three rows of knit and purl stitches. In the first row, try to keep as much tension as possible on the working yarn. This is important, so that the rim is tight enough and the hat can sit comfortably on the head. The tension will cause the needles to be a bit more difficult to move.
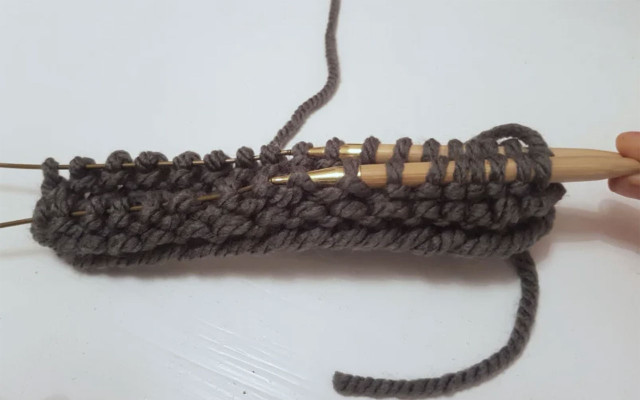


- First, purl one complete row. When you come to the end of a needle, turn the swatch around and thread onto the front needle. Use the rear needle to purl the second side.
- Knit the second row.
- Purl the third and final row.
Step 5: Knit the Body of the Hat
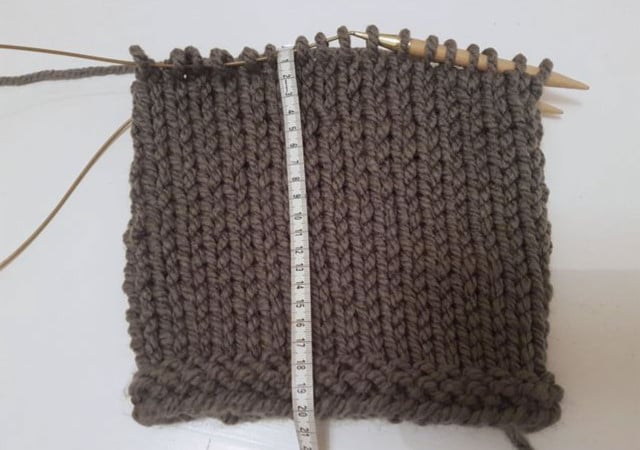


After you’ve finished knitting the rim, you can begin to knit the main body of the hat. For this, you will use only knit stitches. As you knit the first three rows, slowly ease the tension on the working yarn, in order to create a gradual transition from the rim to the main body. After the three initial rows, continue to knit while keeping only slight tension on the working yarn. This will create a soft and relaxed look when your beanie is finished.
Keep knitting your beanie until you’ve reached a height of about 20 centimeters. Feel free to adjust this according to head size.
Step 6: Closing the Hat
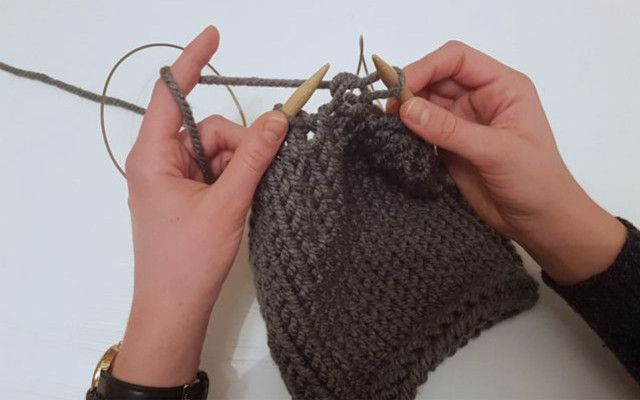


Once you’ve knitted the beanie to the desired length, it is time to close the hat. To do that, you will reduce the number of stitches in order to make the rows narrower by knitting stitches together. As in the main body of the hat, use only knit stitches for this step.
- In the first closing row, always knit the first and second stitches together. Begin by knitting two normal stitches. Then knit two stitches together and two more normal stitches. Repeat this pattern until you come to the end of the row.
- The next row is a “break row” in which you will stitch all normal knit stitches.
- In the second closing row and the last row overall, knit every other two stitches together and finish with one normal stitch. In our case, there were 16 stitches on the needle.
How to Knit a Beanie Hat — Final Step: Finishing Your Beanie
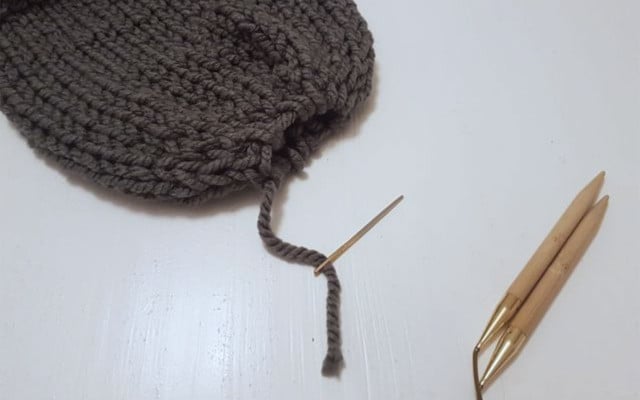


- To finish the beanie, cut the working yarn, leaving thirty centimeters of slack.
- Thread the working yarn onto the darning needle.
- Using the darning needle, thread the yarn in and out through each of the stitches in the final row. After you have done this, repeat one more time. Thread the yarn through to the inner side of the hat and pull the stitches together. Pull until the hole is completely closed. Use the darning needle to thread the yarn into the inner side of the hat where it cannot be seen. Cut off the excess length of yarn.
- Finally, hide the beginning piece of yarn by threading it through nearby stitches.
- Your inside-out beanie is finished!
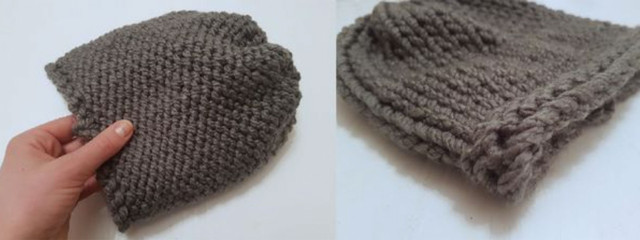


Looking for a new knitting project? Check out this one: Knitted Headband: Beginner’s Guide on How to Knit a Headband
Knitting Your Beanie: Why You Should Use Ethically Sourced Wool
The production of conventional wool can sometimes involve animal cruelty and considerable ecological damage. In the shearing process, sheep are at times seriously injured, abused, and even killed. Alpacas, rabbits and goats, whose coats are also used to make fabric, share the same fate.
Sheep’s wool often originates from New Zealand or Australia and must be transported across an enormous distance to reach the American or European markets, leading to a tremendous carbon footprint.
In order to process and dye the wool, sometimes poisonous chemicals are used. But fear not, there are animal and environmentally friendly alternatives:
- You can find sustainable wool products from companies like Allbirds who use ZQ certified organic wool.
- Plant-based vegan wool alternatives made from organic cotton, hemp, wood cellulose fiber (like Lyocell or Tencel), bamboo, or soybean fiber are becoming more and more widely available.
- You can find vegan yarn, which is 100% free of animal products, at veganyarn.com or darngoodyarn.com.
This article was translated from German into English by Christie Sacco. You can view the original here: Mütze Stricken: Bebilderte Anleitung für Anfänger
** Links to retailers marked with ** or underlined orange are partially partner links: If you buy here, you actively support Utopia.org, because we will receive a small part of the sales proceeds. More info.Do you like this post?


